Fabric Blinds Curtain Rods Window Treatments Trims & Tassels Wallpaper
1-800-590-5844
How To Make a Fleece Sleeping Bag

We love fleece tie blankets which are so easy and fun to make. So what else can we make using fleece? An adorable fleece tie sleeping bag. The simplicity of this style is that you just fold the fabric and tie around the bottom and one side only. Choose some cute fleece fabric and grab your scissors for a quick DIY project. This project took about an hour from start to finish.

Gather Supplies
Fleece Fabric
Scissors
Ruler
Cardboard Guide for Length of Strips
Choosing the amount of fleece you need is dependent on the size of sleeping bag you need. For our example, we used 1 1/2 yards of 60" wide fabric for our young children (5-7). Keep in mind that a yard of fabric is 36" (3 ft.) and 2 yards is 72" (6 ft.). We don't recommend this project for an adult since we are folding the fabric over resulting in a 26" wide bag.
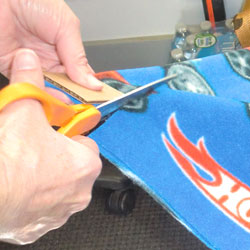
Step 1. Trim any selvage off the fleece. Fold in half with right sides showing.
Step 2. Pin or clip the edges together so fabric does not slip while you are cutting. Measure and cut a 3" square in the corner (where front and back are not connected).
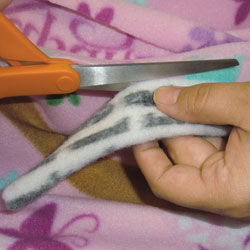
Step 3. Cut 3" long by 1" wide strips around the bottom and side.
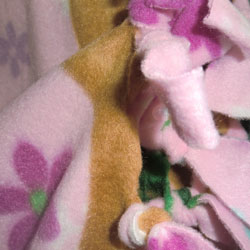
Step 4. Double-knot the strips together around the bottom and about 3/4 of the way up the side. The strips on the top side should be tied but not together so that the child can get into the sleeping bag. Another option is to cut the fold and tie single layer fringe so that the whole top piece can fold over completely (shown on the Rapunzel bag).