Fabric Blinds Curtain Rods Window Treatments Trims & Tassels Wallpaper
1-800-590-5844
🛠️ How to Measure for Curtain Rod Bracket Placement
Step-by-step guide for a smooth, accurate, and elegant drapery installation
 Installing traverse curtain tracks and drapery rods doesn’t have to be intimidating. With the right technique—and a few insider tips—you can achieve a flawless, professional-looking setup that highlights the beauty of your hardware.
📍 Step 1: Locate Your Studs
Proper anchoring starts with finding the right support:
- Studs typically sit 1⅜" from the window lip
- If you need to position your bracket further out, expect the next stud to be approximately 17⅜" from the window
✏️ Pro Tip: Use a reliable stud finder to avoid guesswork and unnecessary holes.
📐 Step 2: Measure Your Drop
To get that perfect clearance from the floor:
- Hook your bracket to the rod - Pro Tip: put the set screw on the top so you won't see it when you are looking up at your rods
- Attach a few snaps, drapery pins, or rings to the drapery rod and your curtains
- Lay your drapery panel flat and fully extended on the floor
- Measure from the bottom of the fabric to the screw hole in your bracket
- Add ¾" for floor clearance, which results in about ½" clearance once the drapery hangs naturally and stretches over time
✅ This method ensures your drapery floats just above the floor for an elegant finish.
🧱 Step 3: Mark Your Wall (The Right Way)
Accuracy is everything—and most walls aren’t perfectly square:
- Always measure from the floor up, never from the top down
- Repeat measurements 2–3 times for consistency
- Mark the screw hole location on the wall based on your final measurement
🛑 Avoid extra holes by double-checking before drilling.
Installing traverse curtain tracks and drapery rods doesn’t have to be intimidating. With the right technique—and a few insider tips—you can achieve a flawless, professional-looking setup that highlights the beauty of your hardware.
📍 Step 1: Locate Your Studs
Proper anchoring starts with finding the right support:
- Studs typically sit 1⅜" from the window lip
- If you need to position your bracket further out, expect the next stud to be approximately 17⅜" from the window
✏️ Pro Tip: Use a reliable stud finder to avoid guesswork and unnecessary holes.
📐 Step 2: Measure Your Drop
To get that perfect clearance from the floor:
- Hook your bracket to the rod - Pro Tip: put the set screw on the top so you won't see it when you are looking up at your rods
- Attach a few snaps, drapery pins, or rings to the drapery rod and your curtains
- Lay your drapery panel flat and fully extended on the floor
- Measure from the bottom of the fabric to the screw hole in your bracket
- Add ¾" for floor clearance, which results in about ½" clearance once the drapery hangs naturally and stretches over time
✅ This method ensures your drapery floats just above the floor for an elegant finish.
🧱 Step 3: Mark Your Wall (The Right Way)
Accuracy is everything—and most walls aren’t perfectly square:
- Always measure from the floor up, never from the top down
- Repeat measurements 2–3 times for consistency
- Mark the screw hole location on the wall based on your final measurement
🛑 Avoid extra holes by double-checking before drilling.
🎯 Final Notes
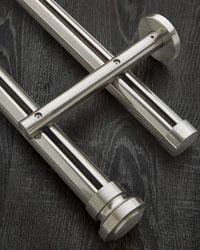
Aria’s H-rail traverse track(pictured on this page) combines stunning design with functional simplicity—but it shines brightest when installed with care. These simple techniques eliminate frustration and ensure your drapery installation looks intentional and polished.
Looking for drapery styling tips or hardware recommendations? We’d be happy to help you.